I just had to share this great craft that’s so easy to make with your kids. And you can find most of the things you need for it just lying around your own home.
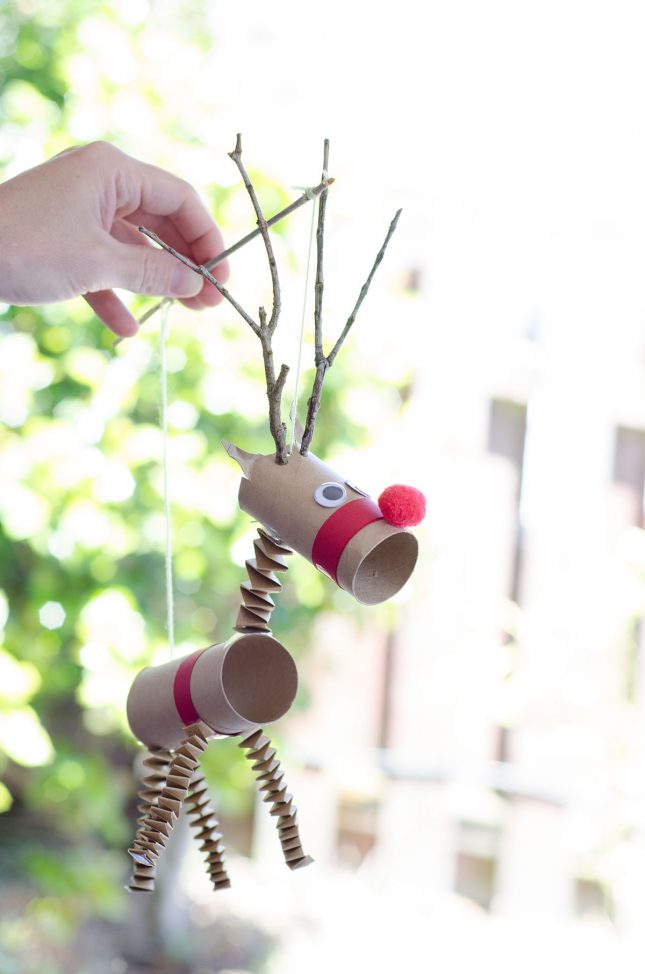
I made a toilet roll reindeer marionette, but you can easily turn these into all sorts of different characters. You could make giraffes, sausage dogs, birds, you’re really just limited by your imagination.
I decided to create this gorgeous reindeer marionette from the book my daughter got out at the Library called The Naughtiest Reindeer. It’s a great little story about Rudolph’s naughty sister Ruby having to step in for Rudolph because he’s sick. But what really inspired me to make the marionette were the pictures. As soon as I saw the front cover, I knew I had to make one!
How to make a toilet roll reindeer marionette
Materials you will need
2 toilet rolls
1 red pompom
Brown card paper
Red card paper
2 twigs for the antler
1 straight twig, or piece of dowel for the control bar
Tape
Glue gun and glue
String or wool
Pin
What to do
To create the head, take one toilet roll and make snips around the top of the roll (see picture below) about 2cm deep.
Fold the snipped ends down and cut off the folds, leaving one tag to create the ears.
You create the ears by snipping a triangle and pinching the ears in (see picture above)
Attach a strip of red paper around the front of the roll. If you don’t have red paper you could paint a stripe around.
Poke a pin hole behind each ear, this is where the antlers will go. Once you have a pin hole made you’ll need to make the hole a little bigger with the scissors. You want the hole just big enough for the twigs to fit in snuggly.
Add some glue to the ends of your twigs and push them through the holes.
You can reinforce the twigs with tape underneath if they are a little wobbly.
Glue two googly eyes on to the head and a red pompom to the front for the nose.
To make the body, all you need to do is add a red strip around the front third of the body. You can attach this with either glue of tape. Again, you could paint a stripe.
To make the legs and neck, take your thin brown card paper and cut 10 strips out of it about 1cm wide.
This next part can be a little tricky for little hands, but my 3 year old could do it with guidance from me. So older kids should be able to do it just fine, once shown. Take two strips. Set them at right angles to each other and glue the strips where they meet. Now it’s kind of like plaiting the two pieces of paper. Fold the bottom piece over the top, then alternately fold the pieces back and forth over each other. Once you get to the end of the strips, glue down the ends.


Once you have four sets of legs, attach them with glue or tape to the bottom of the body.
To turn it into a marionette, just poke a hole at the top of the head, and the back of the body, pass a piece of string through each, and either tie off, or tape off inside the rolls. Now tie the loose ends on to a straight twig, or piece of dowel, adjusting the length of the strings to hold up the head higher than the body.
Now it’s time to have some fun with your new creations! If you’ve created a character from a book, as we did, then a great way to use the puppet is to have your child act out the story while you read the book to them.


This is beautiful, clever, simple and effective reindeer craft and marionette together- love that you tied it with a story also. Brilliant!
Thanks, glad you liked it! — Alayna