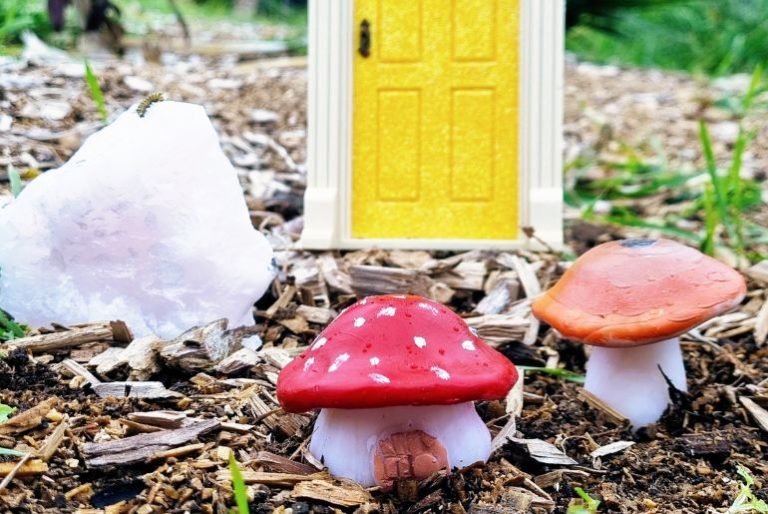
Welcome to the wonderful world of polymer clay crafting! Today, we’re making a fun and whimsical craft activity for kids – a polymer clay mushroom and mushroom house.
Polymer clay is a versatile and easy-to-use material that can be moulded and shaped into a wide variety of shapes and designs. In this activity, we will be using polymer clay to create a cute and colourful mushroom, complete with spots and a stem.
But that’s not all – we’ll also be making a miniature mushroom house with a door. This house will be the perfect home for our polymer clay mushroom, as it sits next to it.
This is a fun and engaging activity, that also helps to develop fine motor skills, hand-eye coordination, and creativity in children. So let’s get started and create our own magical mushroom world!
Clay Mushroom and Mushroom House
What you need
White polymer clay or air dry clay
A tooth pick
Resene test pots in Copper Fire, Red Berry, White, Deep Space
Paper plates – for mixing paint
Paint brush
Water jar
What to do
1. Start by conditioning your polymer clay by kneading it in your hands until it is soft and pliable. This takes a little bit of time to warm up the clay, but is really satisfying!
2. Take a small amount of clay and roll it into a ball. This will be the cap of your mushroom. Flatten the ball slightly and mould a dome shape over your finger.
3. Create the stem of the mushroom by rolling a thin piece of clay into a cylinder shape.
5. Attach the stem to the center of the mushroom cap. Make sure to smooth out any visible seams.
6. Bake the polymer clay according to the manufacturer’s instructions (or just leave to fully cure if you’re using air dry clay).
7. When the mushrooms have cooled down you can paint them. On a paper plate put out a little of the Copper Fire, some white and the Deep Space. Mix four different shades. Then paint in the ring around the top of the mushroom from lightest to darkest.
How to make a mushroom house
The mushroom house is pretty much the same as the mushroom except you add in a door and we added some ridges to the base of the mushroom.
1. Start by conditioning your polymer clay by kneading it in your hands until it is soft and pliable.
2. Take a small amount of clay and roll it into a ball. Flatten the ball and mould a dome shape over your finger.
3. Create the stem of the mushroom by rolling a thin piece of clay into a cylinder shape.
4. Use the toothpick to create ridges on the underneath of the dome. Attach the stem to the centre of the mushroom cap, and add some more ridges to the base of the stem.
5. To create the wee door, just roll a small ball and flatten into a circular shape, and make an even smaller one for the door handle. Attach to the base of the mushroom, and use your toothpick to add some wood panel detailing.
6. Bake the clay according to the manufacturer’s instructions.
7. Once the clay is dry and cooled down you can paint it.
8. For the house, we went traditional and painted the top of the mushroom with Berry Red and once that was dry, we added some white dots.
9. Lastly we painted the door using a mix of Copper Fire and white paint.
And there you have it – a cute little polymer clay mushroom and mushroom house with a door! You can use this as a home for your polymer clay mushroom or any other small creatures you create. Have fun crafting!
If you child enjoyed making this craft, be sure to check out hundreds more craft ideas in School age: Arts and crafts.


