I suspect I’m not the only one who takes hundreds of photos of my kids, only for so many of them to languish somewhere on my computer files. It’s great to have new ways to display them.
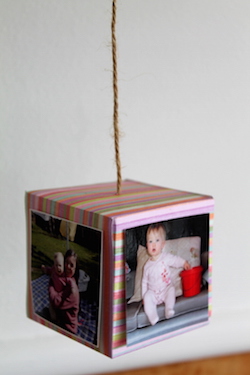
This week we had a go at making “photo boxes,” using photos from some of our favourite early childhood memories. You might like to have a go using your winter holiday snaps.
Homemade photo boxes You will need:
- 4 small photos per child (ours were 5cm square)
- Thin, colourful card
- Ruler
- Pencil
- Scissors
- Glue stick
- String
- A nail (or something sharp to make a small hole)
- Sellotape (optional).
Draw up a template for your box, making each side of the box 1cm larger than your photos (the squares in this image measure 6cm).
Cut round the shape, and then (if desired) score along all the straight lines, to make folding easier.
Fold in the flaps, and then start folding the shape in to a box. Glue the flaps in place as you go, leaving the square with three flaps until the end.
Before gluing the last square down, pierce the centre with a nail, and thread a piece of string through. Knot the string on the inside of the box to keep it in place.
Glue the last three flaps and stick the final square in to place. The neater the cut edges, the easier this will be to do. If you have any trouble, use a small piece of sellotape to help stick the last edge.
Glue photos on to the outside of the box.
Hang photo box where it can be enjoyed – above the dining table, above bedside table, from window latches…






I LOVE this! Great result for straightforward amount of effort 🙂 Thanks!