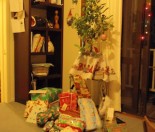
Yes- it’s possible to have a beautiful Christmas tree with minimal effort!
Late November wouldn’t be late November if someone wasn’t trying to get you into the festive mood… and we’re no different. Over the next three weeks we’re publishing a series of tips to help you on your merry “Christmas Decorating” way.
This week we’re aiming to help you get a beautiful Christmas tree with minimal effort! So – let’s get started…….
The Lights go on first…..
- Please test your lights: Yes- before you even consider decorating your tree- untangle that awful mess and check they still work! I’m a fan of LED lights – I know they’re a bit more expensive, but, if one LED bulb goes out, then the rest stay working.
Now……please repeat after me…. “I will not be tempted to start hanging decorations until I have placed the lights on the tree.”
- Need to buy more lights? How many? Depending on the outcome of the step above- you may need to get a few more lights. The rule of thumb: you need about 100 lights for every foot of your tree’s height. We’ve got loads of Christmas lights in stock- pop out and see us (we’re open weekends- address and opening times are at tistheseason.co.nz -we can help with trees wreaths and Christmas decorations too!)
- How to place the lights on the tree:
- Switch the lights on BEFORE you put them onto the tree. You can see where you’ve missed and where you’ve put too many.
- Wrap the branches with the light string, don’t “maypole” up the trunk or from branch tip to branch tip. The whole tree will glow and you can’t see the strands of lights so easily.
- Start at the trunk and pull the string taut out to the end of the branch. Then work back towards the trunk, wrapping the string round and round the branch. Carry the string over to the next branch….. and so on and on and on…. Want subdued lighting? – do this every 2nd or 3rd branch- Want the tree to be seen from outer space??- do this for every branch.
- Occasionally step back from the tree and squint until the tree is blurry. Wherever you see dark holes on the tree, rearrange the lights to fill in.
- Add the lights as you assemble your tree (sorry “real” tree lovers- this one’s not for you!). Install the bottom row of branches, ADD LIGHTS; attach the next section ADD LIGHTS and so on. If my tree is going into a corner, I only light the “front”- I don’t waste precious lights on a part of the tree no-one will see.
- BEST TIP EVER! Consider leaving the lights on the tree permanently. You can do this if you have one of those artificial trees that comes in sections with branches that open like umbrellas…….. (sorry everyone else!). Just be sure to light each section with a separate string of lights! This works great for the bottom two sections of my tree- I take the lights off the top (smallest section) when I pack away.
The garlands or ribbons go on next….
Garland or No Garland? This depends on your preference- In my opinion, you can’t go wrong with metallic/plastic bead or star garlands. Choose a colour that suits your scheme or go neutral (gold and silver are neutral aren’t they?)
Use a dainty size and distribute the garland evenly around the outer tips of the branches.
Using ribbon? Always use the wired edge sort- this means it will hold its shape and not flop everywhere. Also don’t be tempted to go for a massively wide ribbon- it’s harder to weave neatly through the tree- I find widths around 75mm-80mm are easiest to use.
Then add the tree topper….
I know this sound weird, but think it through- if the whole thing topples while you’re up that step ladder, isn’t it better that the tree isn’t loaded with precious sentimental glass ornaments?
What to use as the topper……??? Go traditional with a star, angel, a bow, a cross. For contemporary options try berry picks, feathers or flowers.
NOW you can add the decorations….
- But first, sort them out: Separate filler and theme ornaments. Repair or toss the broken ones. Sort into colours. If you’re buying baubles, it’s great to buy coordinated packs to give options of colour and texture (matt, shiny, glitter). My favourite ornament buying day? December 26th. Stores are almost giving away their leftovers then!
- Add the filler deccies first: Hang all of one colour- this means you can check they are evenly spaced. Repeat with the next colour and so on.
- Don’t hang all decorations so they teeter on the end of the branches, remember to add some decorations a few inches into the tree- this gives depth.
- Protect your valuables: Ornaments with sentimental value, expensive ornaments or special decorations should be hung where they are most likely to be seen- on the upper part of the tree. They’re less likely to get knocked down from here too. Want to start a collection of special handmade ornaments? Jump over to tistheseason.co.nz to check out our Christmas craft kits – there’s options for all experience levels.
- Got a decoration you especially want to show off?? Got wonderful shiny baubles? Hang them next to a tree light- reflected light makes them look way more glamourous!
- Place large/heavier decorations at the bottom of the tree. The balance is better this way and the tree branches are sturdier.
- Speaking of the bottom of the tree: remember your littlies and your pets- you might want to avoid hanging anything really precious where it can be easily pulled down. Try filling this area with extra lights or garland instead.
Lastly: add the finishing touches….
Now comes the final touch- drape angel hair or those tiny tinsel threads evenly over the whole tree. This is entirely your preference and depends on the theme of your tree.
If you are using tinsel threads, remember that cats and tinsel can be an expensive combination- tinsel is shiny and it dangles and cats can’t resist it!
Don’t spoil your holiday with an expensive vet’s bill because your cat swallowed some tinsel you inadvertently placed low on the tree. You have been warned!
The most important tip of all!
You’ve got to have fun decorating the tree! All the style tips in the world are pointless if they become rules and override the fun you and your children should have making the tree a thing of beauty!
One of our favourite tree memories is from a few years ago when our (then small) nephews decorated our tree- the tree was LOADED with decorations to the height the guys could reach- Rest of the tree- BARE! Overall result- PERFECT!
More next week-
Promise! ……If I’m still able to speak after my (now large) nephews have finished with me for telling you about the tree thing.


