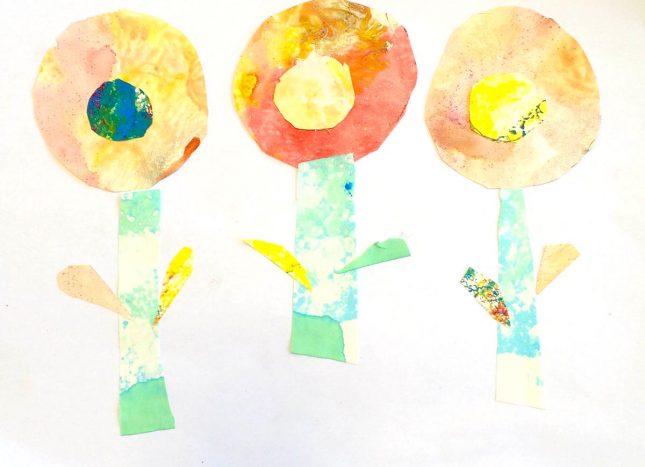
The first spring flower craft idea I created was with my class during art and I thought what a great craft to share with our Kiwi Families community. They’re super simple to make and can be modified for different age groups. I created them with 6 and 7 year olds.
We made our flower craft using textured paper art we’d painted earlier in the week. But you can use any type of paper.
In another class I worked in, I used that pattern paper that you can get from places like Warehouse Stationery. Also, reusing all those paintings you have lying around the house that your kids have brought home from school and Kindy works perfectly!
If you want to do this with toddlers all you need to do is cut the circles and stems out for them first. That is if they find cutting difficult. It’s also a great opportunity to expose your little ones to the language of ‘biggest to smallest’.
Note though, the flowers may not turn out how they look in the images with this age. But just like setting up invitations to play, it’s great to see how they piece their own flowers together with what you provide for them. After all, it’s all about experimentation right?
3 Spring Flower Craft Ideas
Circles and Stems Coloured Paper Flowers
You will need
Different coloured paper
Different sized circles to draw around (unless you want to draw them freehand)
Plain piece of A4 paper for sticking onto
Glue
Scissors
Pencil
What to do
1. To make the spring flowers first draw 3 different sized circles and one skinny stem for each set of 3 circles on different coloured paper. We used some old art projects we’d created on lovely pink paper some time ago.
2. Next cut out each circle and stem.
3. Now glue the circles down from the largest to smallest on top of each other and add the steam.
Make as many as you want, and mix and match circles, colours and stems to create a whole garden! This is my toddlers interpretation of the flowers:
Oh and here is another cool way to do these flowers. Just draw around your child’s hand and glue it to the stem of the flowers so it looks like the hand is holding them.
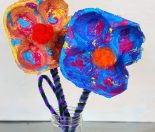
This second spring flower craft idea was made by my 3 year old daughter and my husband as a surprise spring gift for me! So I thought I just had to share how to make these because they’re just so beautiful.
Tissue and Cupcake Paper Flowers
You will need
Tissue paper any colour for the flowers, yellow for the centres, and green for the grass
Straws
Cupcake cases
Scissors
PVA glue
Pencil
A4 paper for sticking the flowers on
What to do
1. First glue the straws onto your page for the stems. Gluing them on first allows the flower petals to pop out of the page.
2. Next cut four large circles out of the tissue paper and 2 small ones.
3. Glue two of the large tissue paper circles onto your straws. Grab your cupcake cases and glue them just off-centre on top of the tissue paper circles. Now glue your last large tissue paper circles on to the cupcake cases, again just off-centre.
4. To create the flower centre, grab your small circle and glue them in the middle of your flowers. These can be any colour, but yellow centres work really well.
5. Finally, scrunch up and tear the green tissue paper to create the grass and glue it to the bottom of your picture. This helps to hide the bottom of the straws.
Toilet roll craft – Paper flowers and vase
The other day my daughter and I made a butterfly toilet roll craft. Today my daughter decided our butterflies needed some flowers! So we created this cool toilet roll vase with paper flowers for our butterflies to enjoy.
This project is a little tricker for small hands. But kids 5 and up should find it relatively easy to make. Plus it’s a great craft to develop kids cutting and fine motor skills.
If you like what you see, join us over on Instagram where we share more snippets of arts, crafts and cooking with kids. And we always love seeing what your creations look like so tag #kiwifamilies on your own images.


