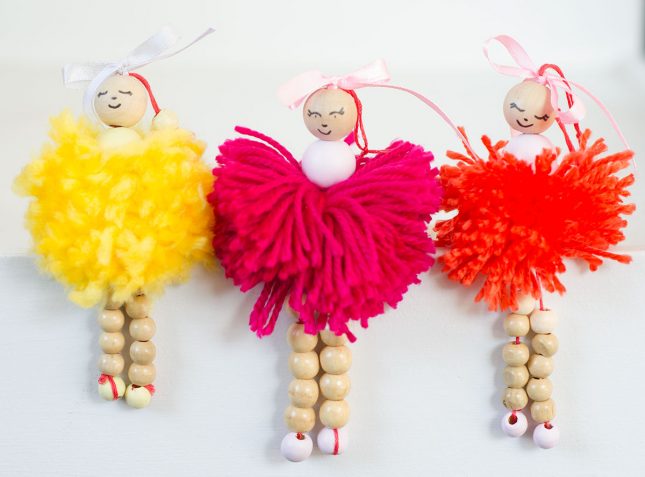
It must be that time of year because at the moment I’m surrounded by school galas, kindy craft fairs and kids’ enterprise days at school.
If you’re not sure what a kids’ enterprise day is, it’s where kids aged 10-12 years create their own stalls and then the rest of the school gets to come and buy their goods.
The money raised goes into school camps and extra resources for the classroom. They really are a fantastic idea.
Anyway, all this got me thinking about what would make a simple, fun but marketable craft idea. And I thought that pompom dolls would be a cool option. They can easily be made for fairs and galas, plus they look great in a kid’s room!
How to make a pompom doll
Materials you will need
Wool
Wooden beads 14 x 12ml small and 2 x 18ml large
Paint (we used Resene Pink Lace for one doll and Resene Caramel on the other)
Ribbon
Scissors
Needle or tape to help with the threading
What to do
First, paint 3 small wooden beads and 1 large wooden bead in the same colour. If you want a richer colour I would give the beads at least two coats of paint.
I found that if I put my beads on to a paint brush this made it very easy to paint. If you don’t have varying size paint brushes you can always use small twigs from a tree or bush.
Next, create a pompom using your chosen colour. We went with a bright yellow, an orange and a magenta colour. There are a number of ways to make a pompom, but my favourite way is using your hand. To do this, wrap the wool around 3 fingers about 30 times if you’re using thick wool, and between 100 and 120 times if you’re using thin wool.
Once you’ve wrapped the pompom take it off your fingers and tie two pieces of long wool or string around the middle. One string will become the body and head, the other piece will be used to thread on the legs. So it’s a good idea to have a long piece of string then it’s easy to tie the beads off at the end.
Now cut your pompom. You can trim the pompom to whatever size suits you.
Your beads should be dry by now. When all the beads are dry, start by threading 6 of the small wooden beads on each leg.
To make this easier I used a needle or you could tape off the end of the string into a point. This makes it super simple to thread, especially for little fingers. Finish off each foot with a small painted bead and tie this off. You can either just tie a knot around the foot, or you can take the thread back up through the legs and tie off above the legs (this gives it a tidier finish).
To create the body and head, thread the painted large bead on first, and then an unpainted large bead on top. You can draw a face on the bead, like we did, or you can leave them plain, they look good plain too.
Tie a little bow with the ribbon and then thread your last painted small bead on, and tie off the top off the string.


