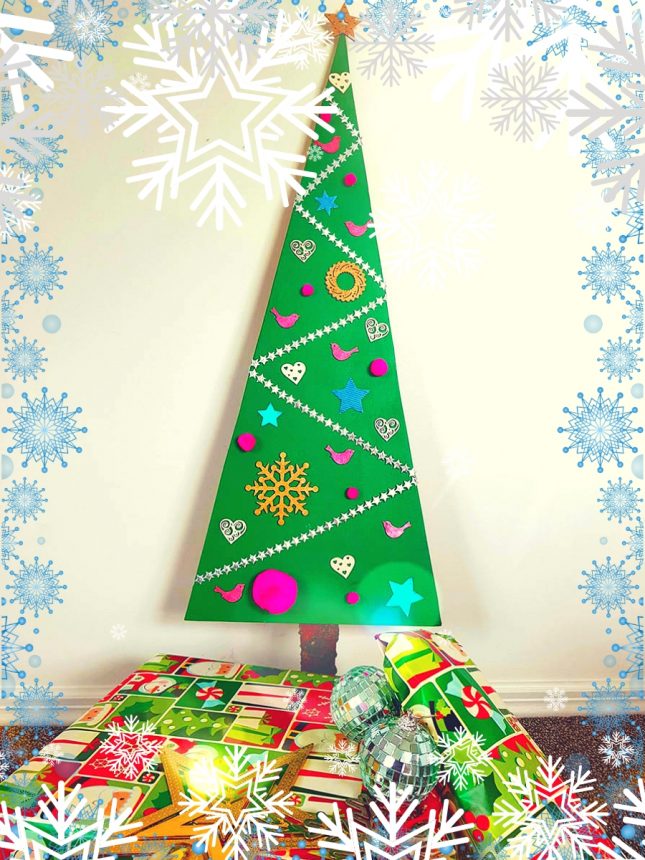
This year I decided to starting decorating my home early with Christmas decorations. You see for the past 2 years we haven’t had the tree and decorations up until a week out from Christmas. So this year I’m bring the festive feel into my home starting right now! And for one of my first projects I’ve created this eco-friendly Christmas tree.
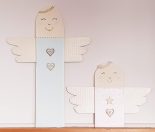
So although I made my eco-tree from plywood, I set the kids up some cardboard triangles and let them go wild.
It was great fun. I also gave them some wooden decorations to paint and they loved it! Make sure if your kids are joining in you put a drop sheet down below and on the table. It can be a very creatively-messy activity!
Giving the kids their own Christmas tree to decorate was also good for my sanity.
They really wanted to help me with mine, but I knew I would have tried to control where they placed the decorations and the way they painted it. Doing this allowed them the freedom to play and explore without my judgement.
If you don’t mind the kids working on your one, by all means let them go crazy, it will probably look fantastic.
I’ve recently discovered Resene Pearl Shimmer along with a whole bunch of metallic and special effects paints, but I really loved the Pearl shimmer. I used it on the white hearts.
It’s a little hard to tell in the photo but it gave them the most gorgeous shimmer effect. My only regret was that I didn’t use the Pearl Shimmer as a wash to go all over the Christmas tree before I stuck down all the decorations. It was one of those ideas that came to me after!
If you try it out, I would love to know how it looked. I’m looking forward to having a play and trying Resene Pearl Shimmer on some future projects.
Along with the Pearl Shimmer I discovered Resene Glitterbug which is an awesome metallic red, Resense Gold Dust and the most amazing metallic blue Resene Yeehaa.
These have to be my new favourite colours when it comes to creating Christmas-y decorations, I can’t wait to see what else I can make with them!
DIY Eco-friendly Christmas Tree
You will need
Plywood
Jigsaw
Wooden craft decorations (I got mine from spotlight on sale)
Card shapes
Pompoms
Star ribbon
Strong craft glue
Medium stick
Resene Quick Dry Primer
Resene test pots in Dutch White, Pearl Shimmer, Glitterbug, Gold Dust, Crusoe, Yeehaa
Plant pot, or other suitable base
What to do
1. Rule up a triangle on your ply. Decide what height suits you (ours was was around 65cm high) then cut it out using the jigsaw.
2. Using the primer give you triangle one coat. Set aside to dry or use a hair dryer if you’re in a hurry.
3. Next paint your first coat of Crusoe onto your triangle. Set aside to dry.
4. While you’re waiting for your first green coat to dry, start painting your decorations. I Used Resene Dutch White for the hearts with two coats of Pearl Shimmer on top. I then painted my birds in the Glitterbug, my stars Blue and the top star, the wreath and the snow flake with Gold Dust. Give them all at least two coats.
5. Give your tree a second coat of Crusoe and set aside to let dry once more.
6. Now comes the fun part of arranging the decorations. I like to lay mine out before gluing them down. This way you can move them around and step back to see if your layout looks good, before committing. Once you’re happy, carefully glue into position.
7. Using a branch from the garden, or if you don’t have that cut yourself a base from the remaining plywood and attach it to the back of your tree. Use something much stronger than craft glue for this. I used araldite glue and it stuck well.
8. Place your tree into a container using stones or pebbles to weigh it down and keep it steady. If you like you could then decorate the base with tinsel or wrapping paper.
9. Now you just need some presents to go underneath!
If your like this article be sure to check out our other Christmas craft posts here and here.And be sure to check out hundreds more crafting ideas in our Creative arts and crafts section.


