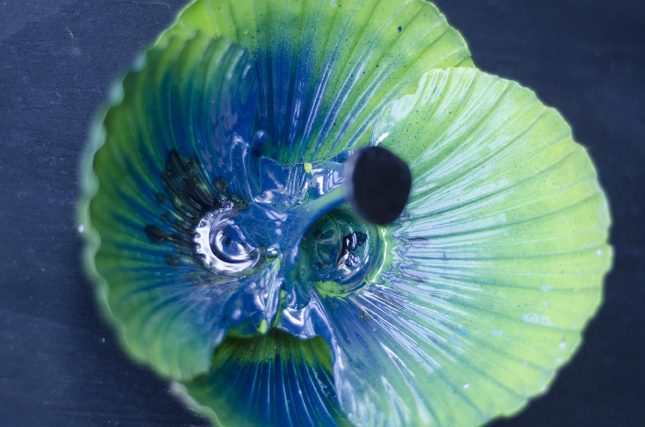
Today I am going to show you how to make shell flowers. This is a great craft activity to make with older kids. And you get to start by heading down to the beach to collect a range of shells, which is even more fun than the making part!
These gorgeous shell flowers will brighten up any corner of your home, inside or out. We currently have ours displayed in a tall vase outside at our front entrance, and they look really great! If you want to display yours outside, just add an extra optional step below to spray a UV protectant clear coat over the top of the colour you choose. This will keep the colours looking bright and poppy for years to come.
Other great spots to display these would be in a front entrance hallway, or in the corner of a living area. If your children are making these, they’ll look great displayed in their rooms.
Like dried flowers they last virtually forever inside, and just require the odd dusting. You’ll find they’re definitely a talking point too.
To make larger flowers, you will need larger shells. The instructions here suggest scallop shells, which are the perfect size for this craft here in New Zealand. In other countries scallops don’t grow anywhere near as large as ours do. You might like to try large clams, oysters or large cockles will all work well. Check out this website for images of shellfish you might find at your beach.
Just a quick note of caution when using spray paint. We usually recommend children use acrylic paints when crafting, but this particular project really requires spray paint to get the beautiful ombre effect happening. Also, there’s a lot of hot glue gunning involved in this craft too! So this makes it more suitable for 12+ as a craft project. And please do your spray painting outside with plenty of ventilation and suitable safety equipment.
I would like to thank my wonderful sister Gena for showing us how to make these beautiful creations.
How to make shell flowers
You will need

A hot glue gun and lots of glue sticks
Fencing wire
Spray paint of your choice
High gloss black paint
4 scallop shells (you could also use pipi or clam shells)
1/2 an apple or 1/2 a polystyrene ball
A pair of pliers
A tile
Baby oil
How to make
1. Press the wire through the middle of your apple. Then place two of the scallop shells onto the apple and glue them together at the base. The trick here is to use a lot of glue
2. Once you have let it dry for 5 minutes you are ready to make the stem. First, take away the apple and snip the inside wire to about one centimetre long. Grab a tile and rub some baby oil on it. This is so when you turn the flower upside down it won’t stick to the tile.
3. Now add a decent amount of glue to the remaining wire on the inside. Quickly turn the flower upside down onto a tile and let it sit for 5 more minutes. Scrape the flower off the tile with a spatular.
4. Time for spray painting. You can spay them however you like, but I find that two colours and a black stem looks really effective. Spray your base colour all over and let it dry before applying a second colour.
5. Once the first coat is dry you can spray a second colour on the inside and paint the stem with a gloss black paint. Or get imaginative and match the colours of your favourite flowers, or just for colours and a design you love!
Handy tips for making your shell flowers
- If you have dark shells spray paint them white first.
- If you are using Metallic paint make sure it is a warm day. Otherwise the metallic paint will dry dull.
- If the stem falls off just glue it back on.
- You can hang them on the wall by not adding the wire and placing a hook on the back instead.
- Try this with different kinds of shells for different effects.
- I have found that having two glue guns on the go works well, as you will use a lot of glue.
Happy making everyone. If you do make one please comment below and tell me how they turned out. And for more great crafting ideas for teens, check out our Teens: Creative arts and crafts section.


